Santas
Santas

I have been making pavlova for friends and family for many, many years but it is only now I have finally sat down and written it into a recipe! Hope you enjoy – but before you start, here are a few essential tips:
Clean your mixing bowl and utencils
Before you start, make sure that your mixing bowl and all utensils are ‘squeaky’ clean. If you have recently used them for baking anything containing butter or margarine, a fat or grease layer can sometimes remain on the surfaces. Grease is the enemy of a good, fluffy pavlova as it kills the air in the egg whites. Give all equipment you are about to use a good polish with a clean dry tea towel, or you can wipe with some kitchen roll and a little white vinegar.
Gently does it
Treat your pavlova mixture very gently – you want to keep as much air as possible in the mixture! Do not knock the bowl or tap mixture off your utensils on the edge.
Use a large metal spoon.
Try to use a large metal spoon rather than a wooden spoon or plastic as a metal spoon will knock less air out.
I use a large flat tray, lined with reusable liner or white parchment paper.
For a large pavlova I use the bottom part of my grill pan as I know the base will then stay perfectly flat.
There must be no traces of yolk as this will stop your whites from being fluffy. It might be easiest to break each egg white into a small cup first to check it and then add to a large mixing bowl.
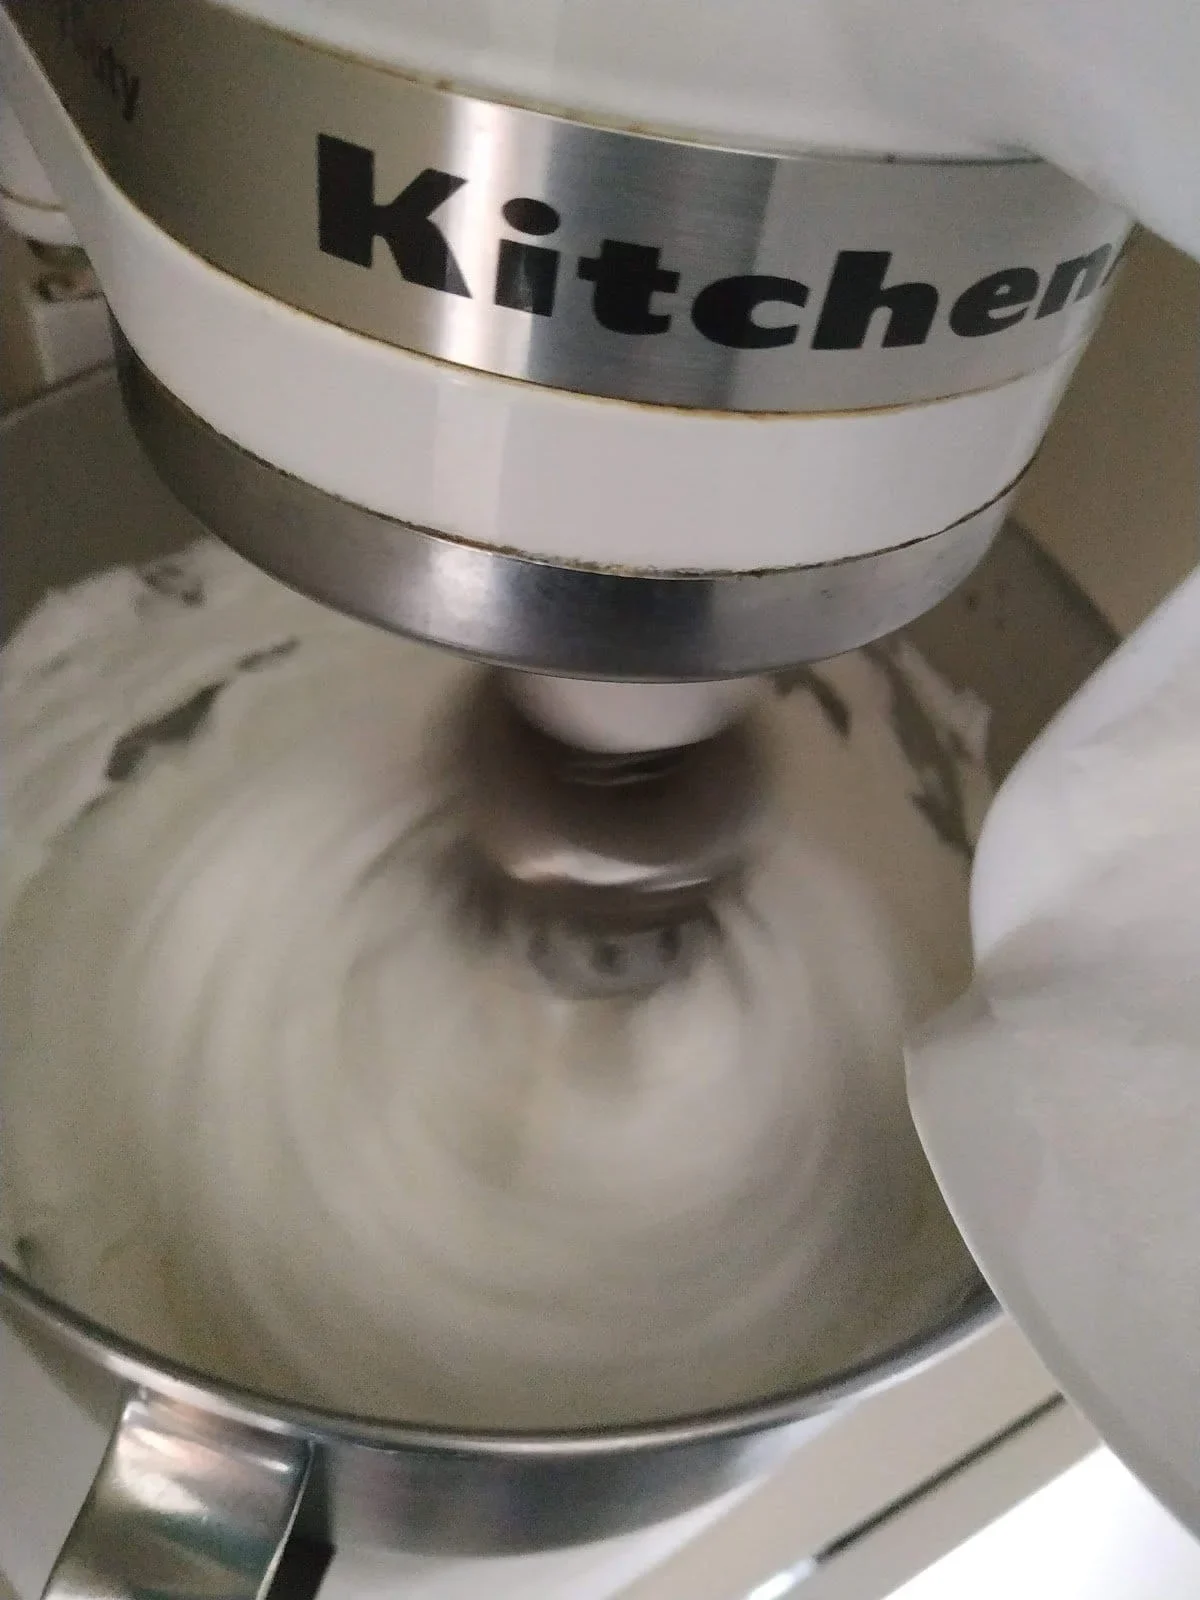
Start on a slower setting until the sugar dissolves and then put it up to full speed until the mixture volume is pretty big. If using an electric hand whisk or manual whisk, this will take a bit longer than 2 minutes.
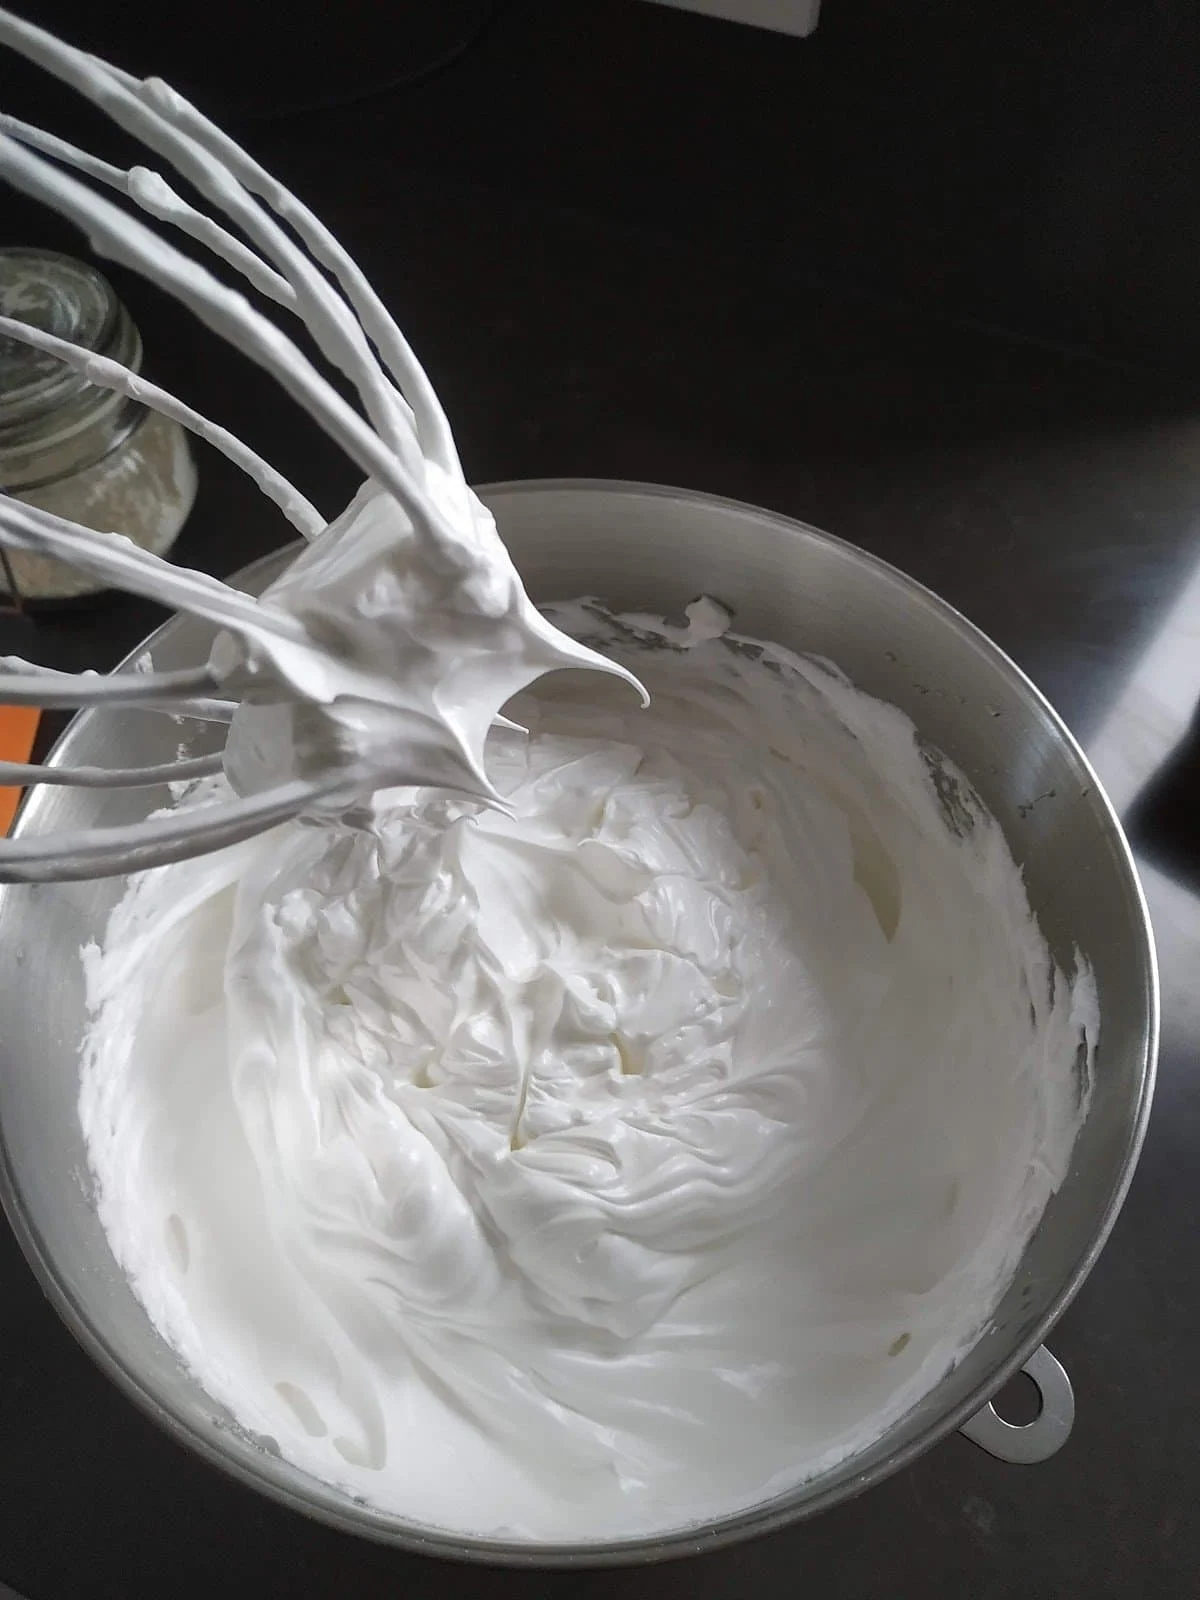
Turn the whisk back to fast and whisk for a further 2 minutes. The mixture should be smooth, glossy and sit in stiff peaks.
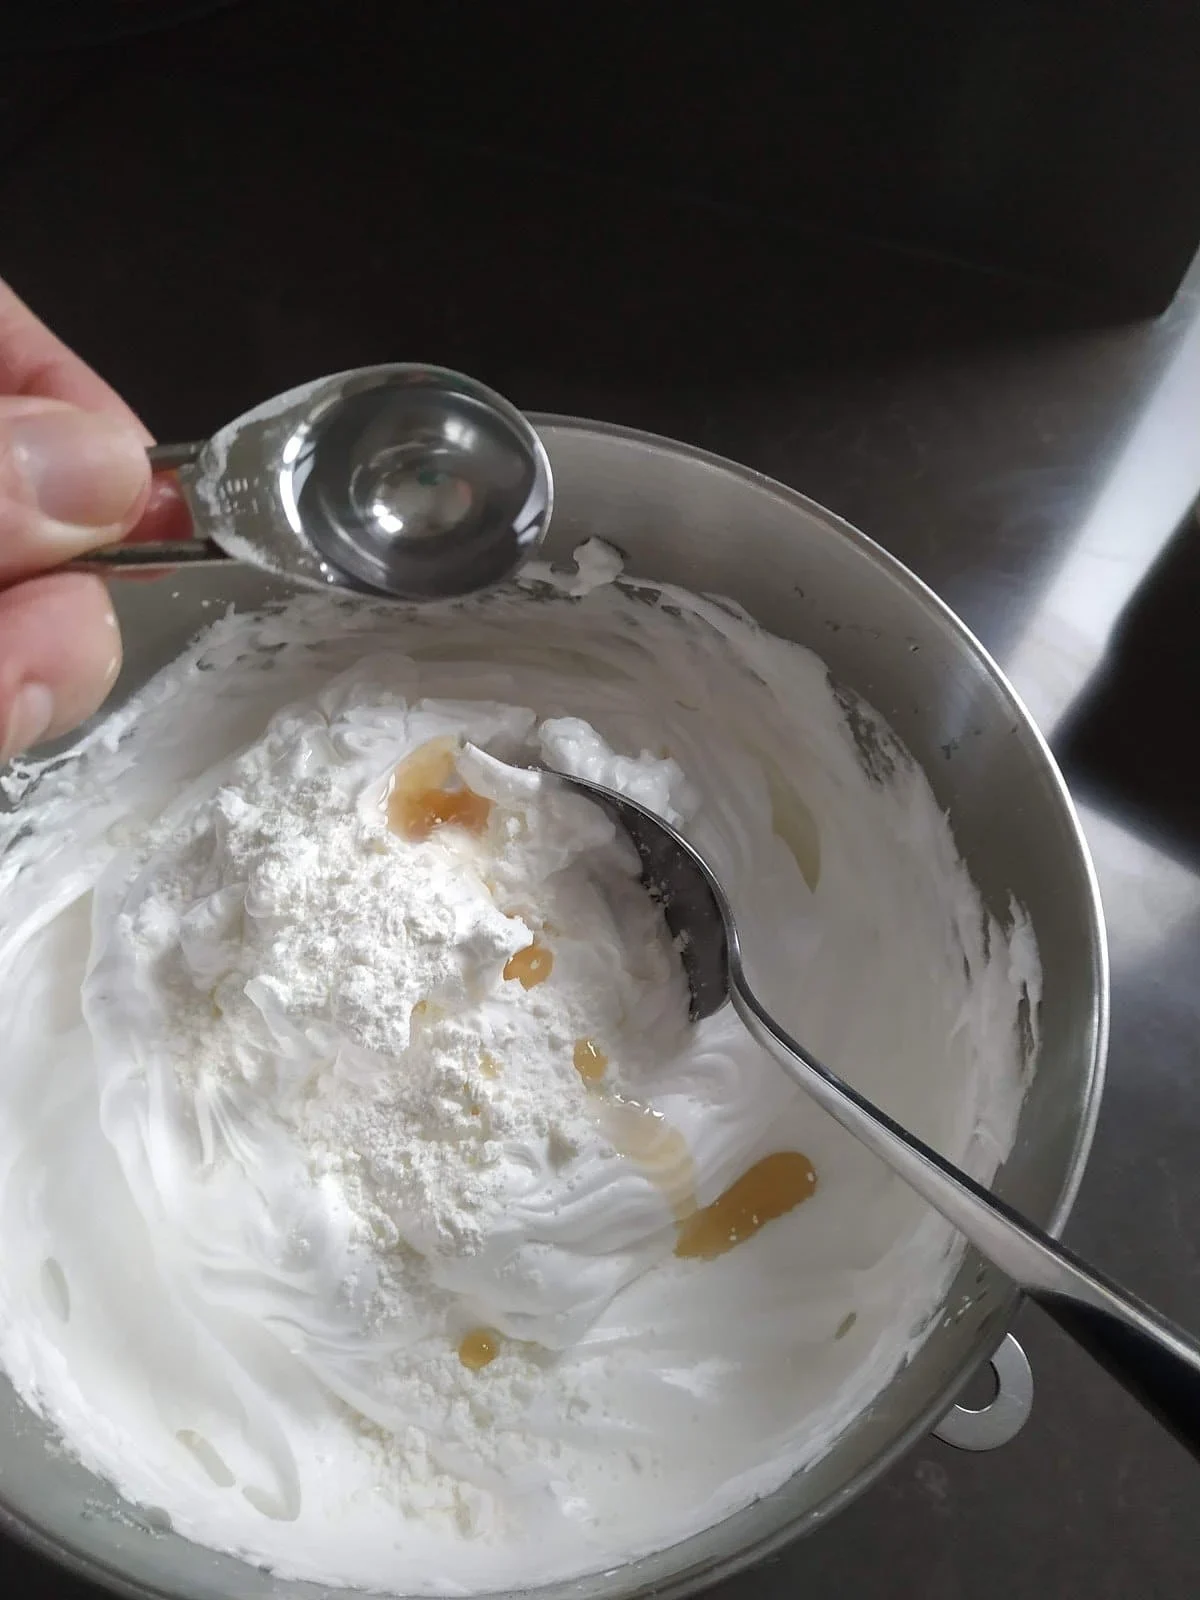
Immediately start to gently fold the cornflour, vinegar and essence through the mix with a large metal spoon, fold all the way to the bottom and aim to make only 10-12 folds to keep as much air as possible.
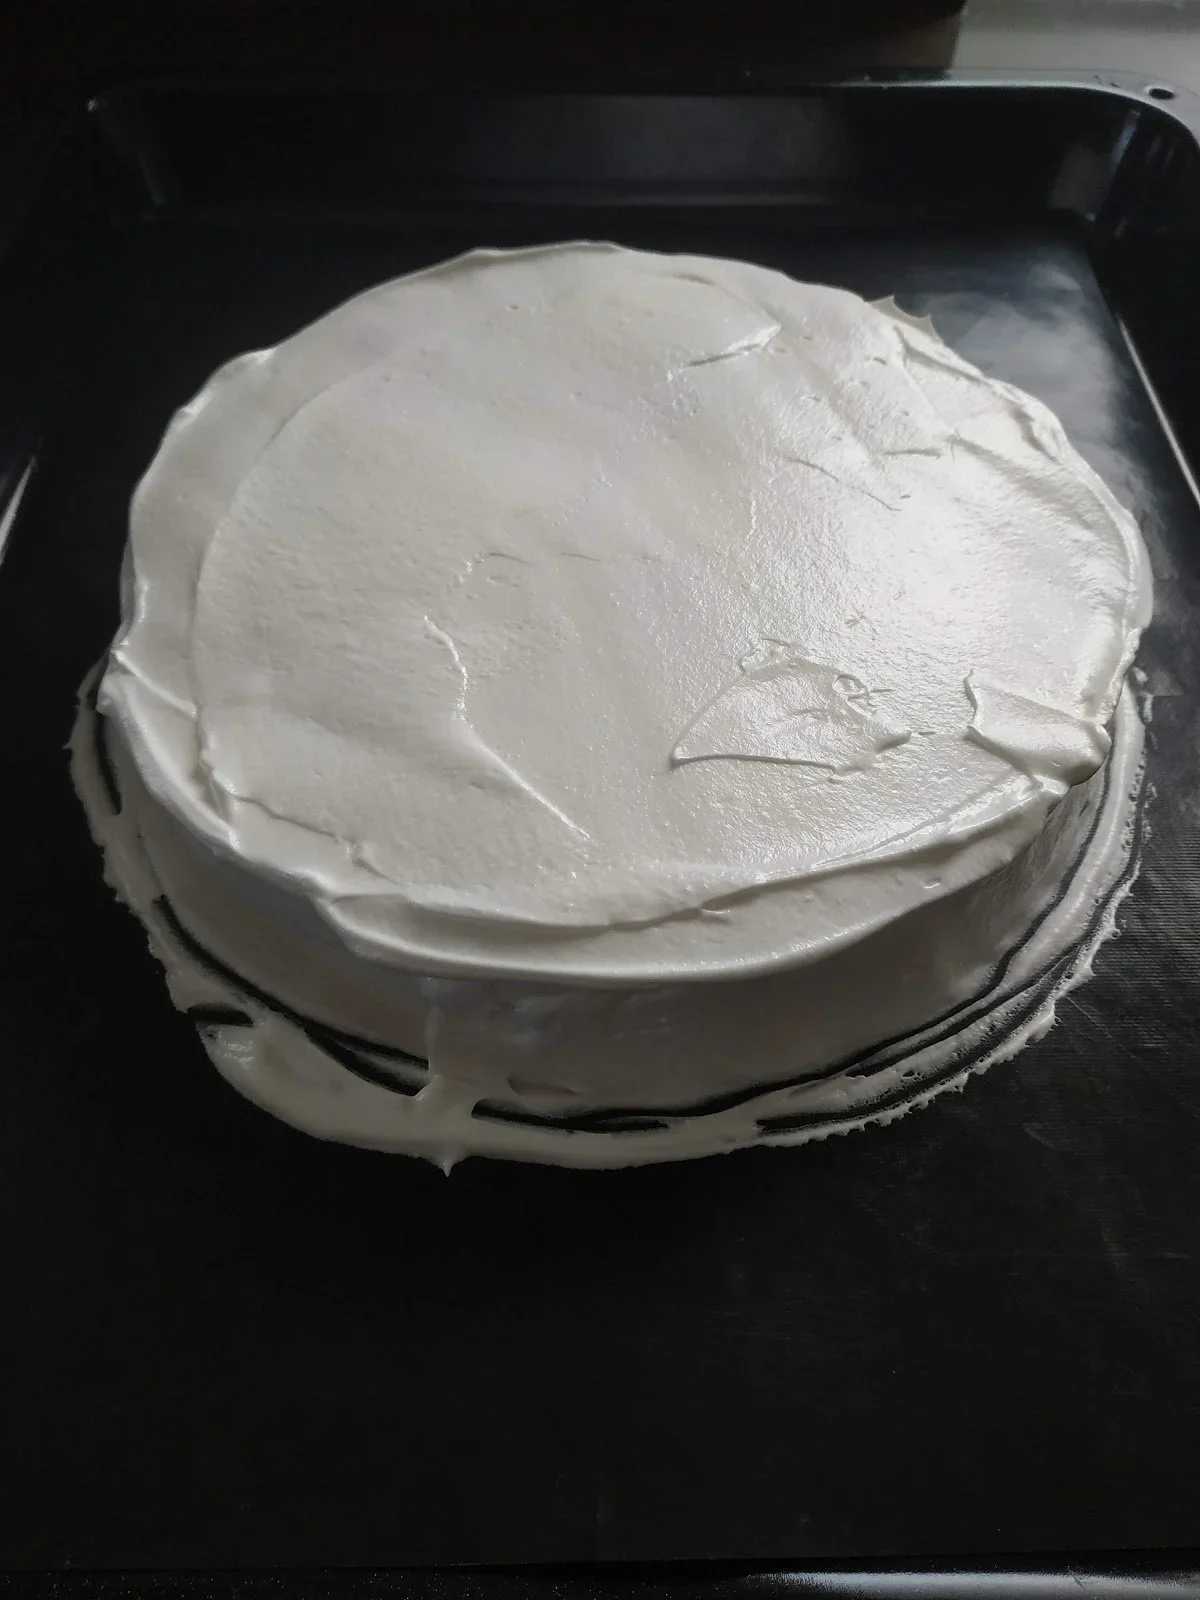
Think about the serving plate you plan to use and what will fit. Your shape should be approximately 2” deep (or whatever depth you want the end pavlova to be).
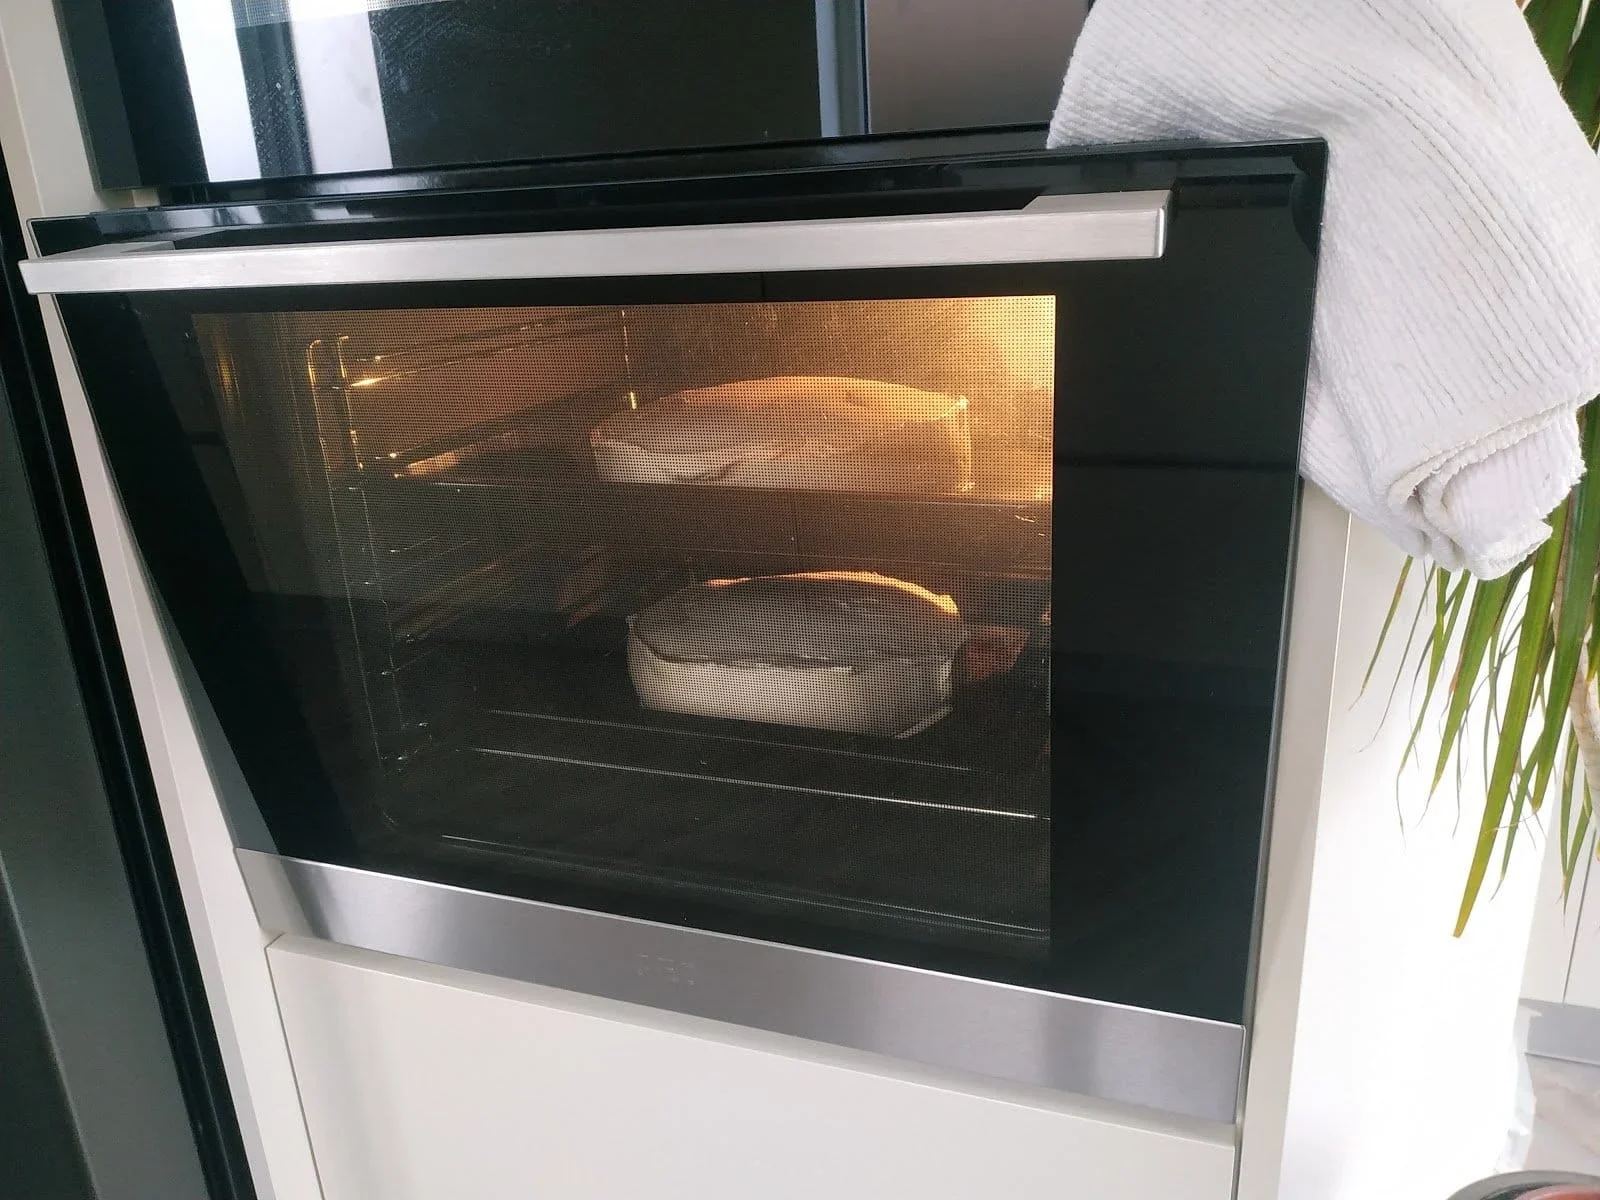
Bake for 1 hour for small or 1 ¼ hour for larger. Do not open the oven door at any time during baking – not even for a photo!
If you move the pavlova before it gets a chance to cool it may collapse. Prop the oven door open slightly with an oven cloth to allow the pavlova to cool very slowly – if it cools too fast you will risk it cracking. I try to bake the pavlova last thing in evening and leave it to cool in the oven slowly overnight.
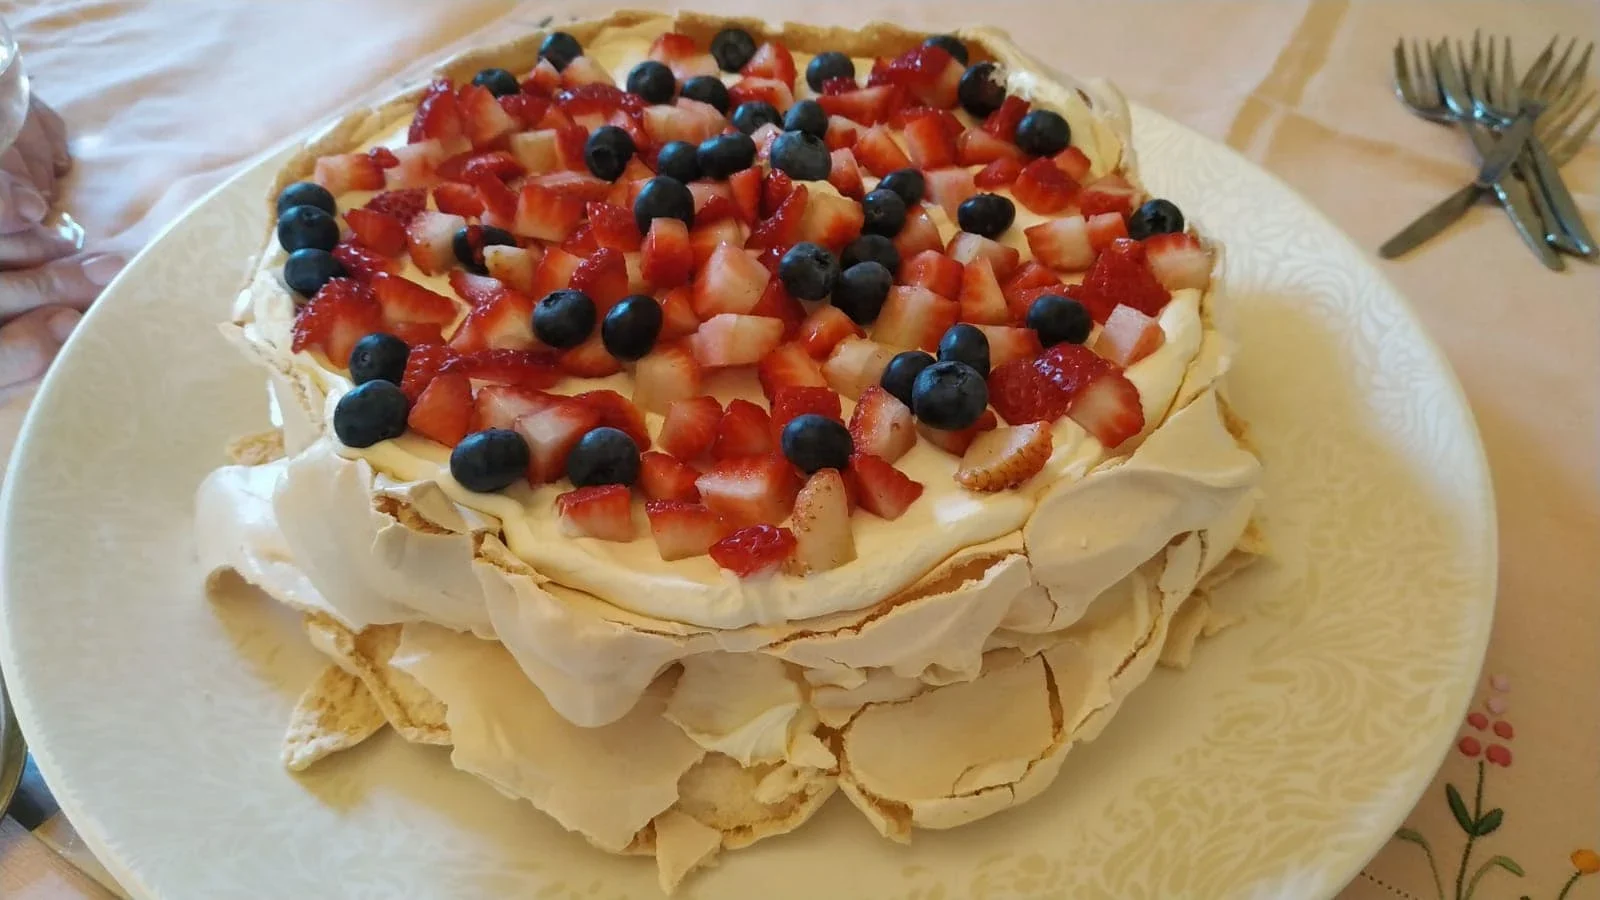
This means that the pavlova is ‘upside down’ but it gives a lovely flat surface for decorating. The pavlova can also be moved gently from the baking tray to your serving plate with a thin palette knife or cake slice if you want the crispy top to be the side decorated.
Santas
Green Greetings A classic style cake with crisp white on green design. A straight frill has been used as a band around the middle of
White Christmas Wedding Cake
Frilled Christmas Tree
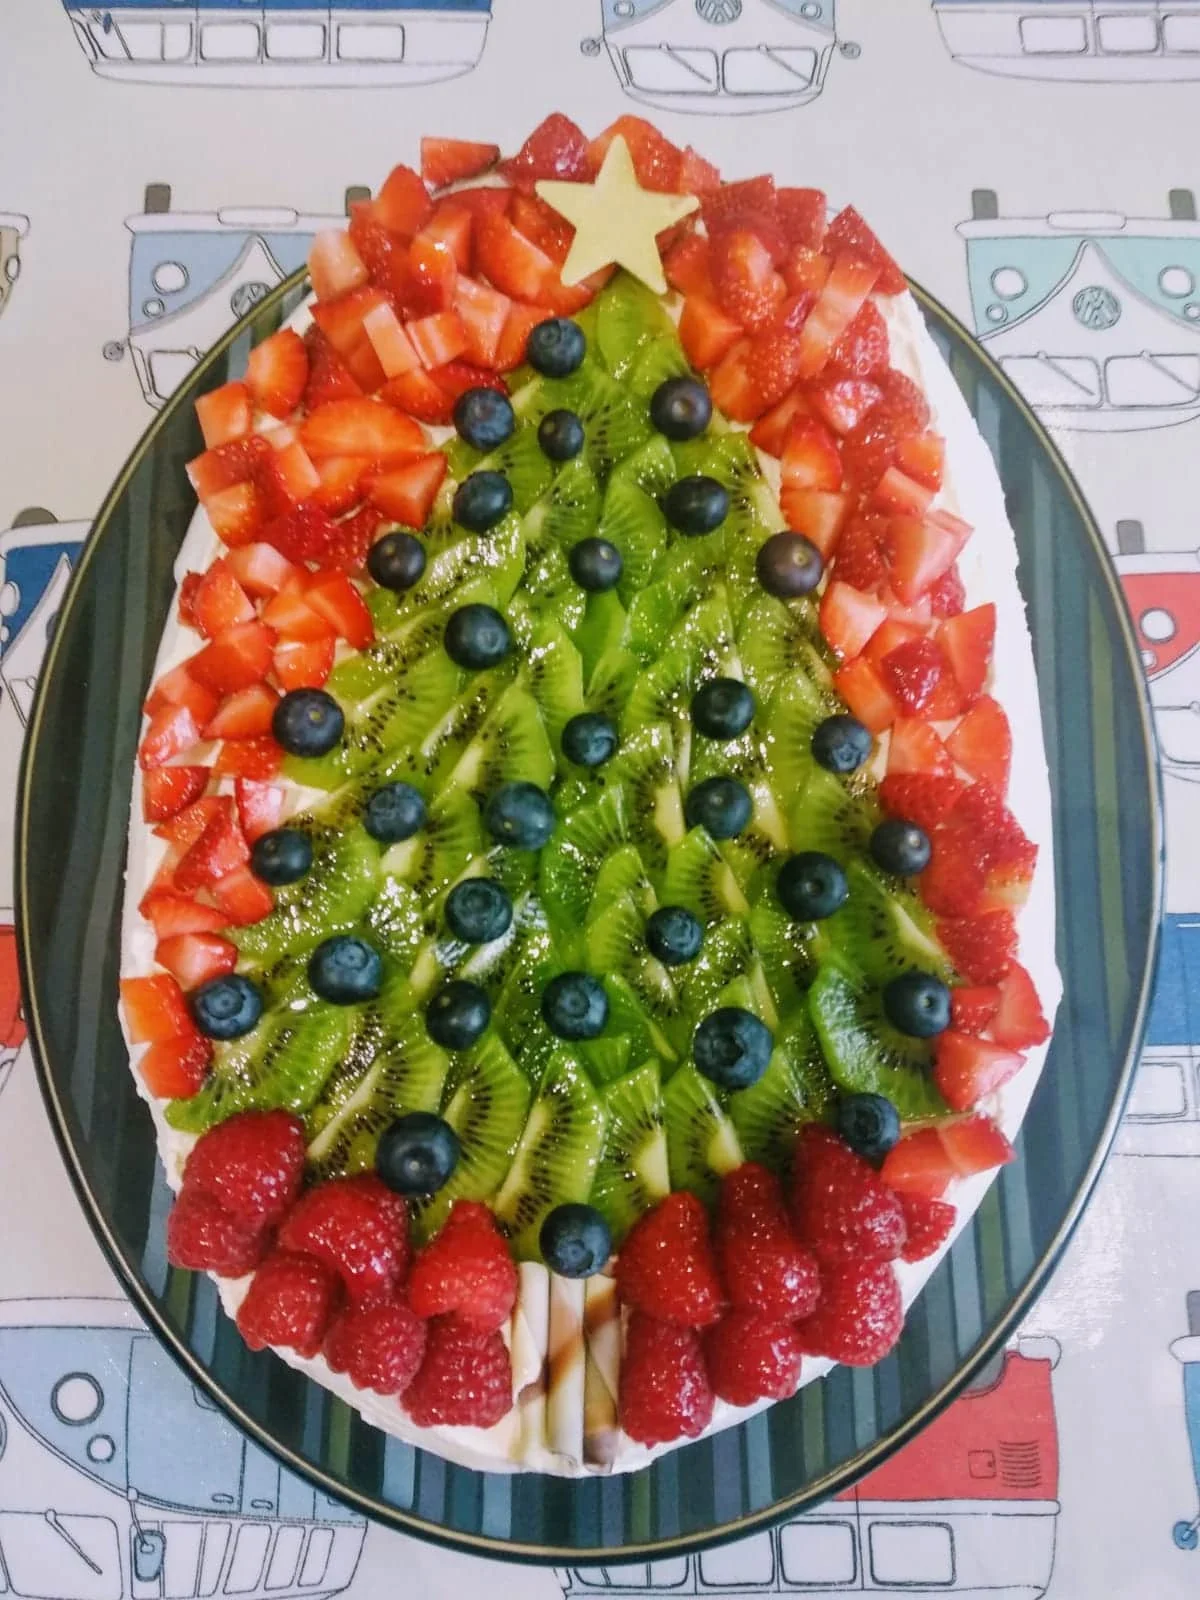
We’d love to see how you got on making your own pavlova. Share your pictures with us on our Facebook page.
We offer quality products at an affordable price.
We provide fast reliable shipping via Royal Mail.
We take pride in the service we provide to our customers.
Website by Highly.Digital – Elevate Your Brand with Content Strategy, SEO, and Custom Web Development.